How to record computer screen
For various reasons, you sometimes need to record your PC screen, or record your PC game play. If you can record your desktop on Windows 7 or Windows 10, you can distribute your video clip among people or share it on YouTube with others.
Today, we are gonna try some paid or free PC screen recording software applications and see what’s the best for us.
Before we start, we want to set some criteria on hardware support and output quality so better apps will stand out. The minimum requirements are shown as below:
- Able to record a pre-defined area on the desktop, or full screen.
- Supports 1080p 60hz recording
- Supports hardware-accelerated encoder, using Intel’s QuickSync, nVIDIA NVenc or AMD’s.
- Optionally record OpenGL, DirectX and desktop video.
Free PC desktop recording software
OK, let’s start with some free PC screen recording candidates. From our Google search result, we only found VLC because no other free recording software can be found. So let’s try it anyway.

VLC is a famous video player program and it does a lot of playback things. Yet, I did not know it’s got desktop screen recording capability too. I downloaded it and opened it. Hmm… Let’s figure out how to use it to make video recording on your desktop.
- Open VLC media player.
- Open Media -> Open Capture Device…
- Set the capture mode to desktop.
- Set desired frame rate to 15 if you are making a desktop presentation or video tutorial.
- Click play and you will see your desktop in the VLC window.
- Select Playback -> Record and the recording begins. You need to minimize it so it will not record itself in an infinite window loop.
- When it is done recording, video is saved in Videos folder under your Windows account automatically.
The cons are very obvious:
- You can not specify the area you want to record
- You need a very fast Intel core i7 CPU and very fast SSD because there is no hardware encoding
- The output file is very large. You can not make use of the output directly. You have to transcode it again into a more efficient format like mp4.
- It can not do video cutting for you. You need another tool to trim the unwanted video segments.
We really don’t recommend VLC to capture your desktop video.
PC screen capturing using HDMI capturing devices
![]() HDMI port
HDMI port
If you have both a laptop PC with a HDMI output and a HDMI capturing device, this option may work for you. Here are the steps:
- On your laptop, set the screen resolution to 1920x1080p
- Connect the HDMI output to the prepared HDMI capture device such as AverMedia Live Gamer Portable, which can record the 1080p 60hz video directly into a SD card storage without a PC,
- Once the capturing is complete, you can edit the files on a PC video editing software later.
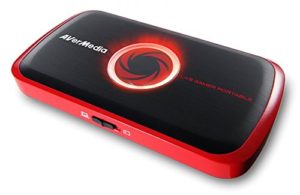 Avermedia Live Gamer Portable
The Pros of choosing this option is:
You not only can use this device to record your PC screen, but also can you possibly use it to record your game play on the gaming consoles such as PS4 or XBOX One. This kind of device also comes with an built-in hardware encoder that compresses output files to smaller sizes without quality loss. The price of such capturing device isn’t too expensive comparing with pure software solutions. Sometimes it’s even cheaper than a capturing software. Please note that it can not record any video signal with HDCP-copyrighted source, such as a Blueray disc player. However, a lot of YouTubers seem to be able to bypass HDCP using a HDMI splitter.
Record PC screen using paid software
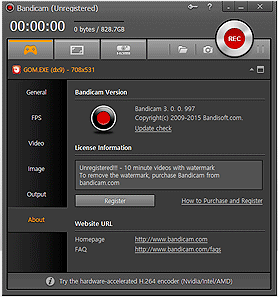
To satisfy the need of capturing pre-defined area of the screen, hardware accelerated encoding, output file trimming, we recommend bandicam and bandicut. We tried many paid options and found that this is probably the best for most users.

bandicam
Record Game play or PC screen using nVIDIA SHIELD tablet
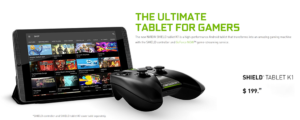
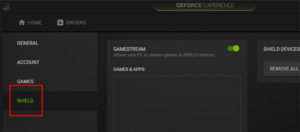
If you already have a PC with nVIDIA GPU and plan to buy an Android tablet, then this method may also be considered. On your PC, follow the steps below:
- Install the GEFORCE EXPERIENCE
- Create a nVIDIA account
- Sign in
- Click settings
- Click shield
- Turn the game stream on
On your nVIDIA SHIELD tablet, do the following:
- Sign in the same nVIDIA account in your SHIELD Hub
- Tap GAMESTREAM and you can stream any game or applications, which you previously scanned or added to GEFORCE EXPERIENCE on your PC, to the NVIDIA SHIELD tablet.
- Once the streaming begins, swipe your finger from top to middle of the screen
- Find the Share button and tap it.
Now, you are able to record your game play or PC applications at 720p 30hz or 1080p 30hz, I guess that is enough for purposes in general.
By: CJ