
How to change language in Outlook 2016
Changing UI language of Outlook 2016 is easy. Steps are as below:
- Log in your Office365 account in Office365 Portal Site
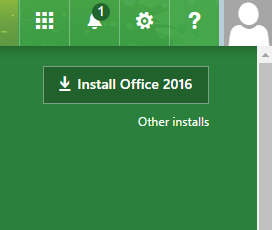
- Click on Other Installs at top-left.
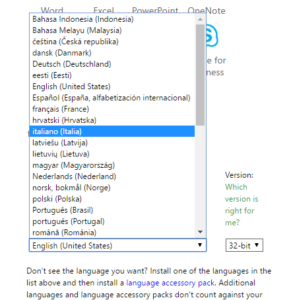
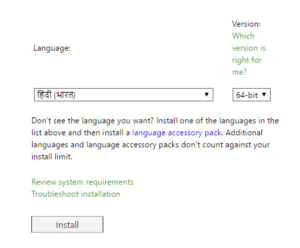
- At Language section, select your language and matching bit-version to your Office installation from the pull-down menus.
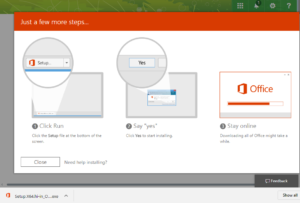
- Click on Install and language pack will be installed.
- Once installation is finished, open Outlook.
- Click on File at top-left.
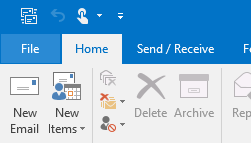
- Select Options in the pull-down menu.
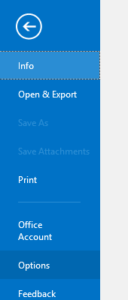
- Select Language in the option menu.

- In Choose Display and Help Languages, find the language that was just downloaded.
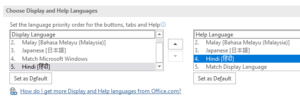
- Click on Set as Default buttons under both selections shown as above.
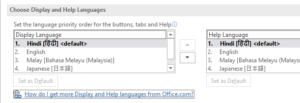
- Now, the language will appear as the first language in the list.
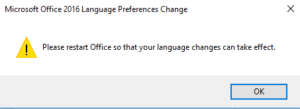
- Click on OK to exit the Outlook Option window.
- Click on OK to quit restart reminder and restart Outlook.
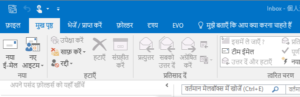
- After coming back from restarting Outlook, UI will be displayed in the language we just downloaded and configured.
The language change over UI is quite easy and saves us a lot of time. Yet, Microsoft’s Office365 subscription is quite convenient for those of you who change language UI from time to time because you can simply download the language accessory pack for free. If you bought Office 2016 off, then you might need to purchase language accessory pack separately whether it is retail package or volume license package.
By: CJ