

How to build an LAN-to-LAN IPsec VPN tunnel with DrayTek routers
Internet Protocol Security (IPsec) is commonly used to build secured VPN tunnel. Unlike PPTP and L2TP, it is a more advanced protocol for building a VPN connection. Yet, it is more difficult to setup. However it may help if you are in an environment where regular PPTP and L2TP VPN connections are intended to be blocked.
Today, we are going to show you how to build this IPsec LAN TO LAN VPN tunnel. With this tunnel, all traffic from WIFI or LAN client devices under the client-side router of the VPN can be redirected to the server-side router of the VPN.

If you are looking for a reliable VPN service provider, we recommend you this VyprVPN, because it works on almost all devices.
DrayTek VPN routers
In my opinion, DrayTek VPN routers isn’t the most user-friendly router and it’s not even the one which has the best performance per cost ratio. However, one of its advantages is the ease of establishing VPN at a breeze. With 2 of the same Vigor routers, you can easily build LAN to LAN PPTP, L2TP, IPsec, SSLVPN tunnels for multiple users.
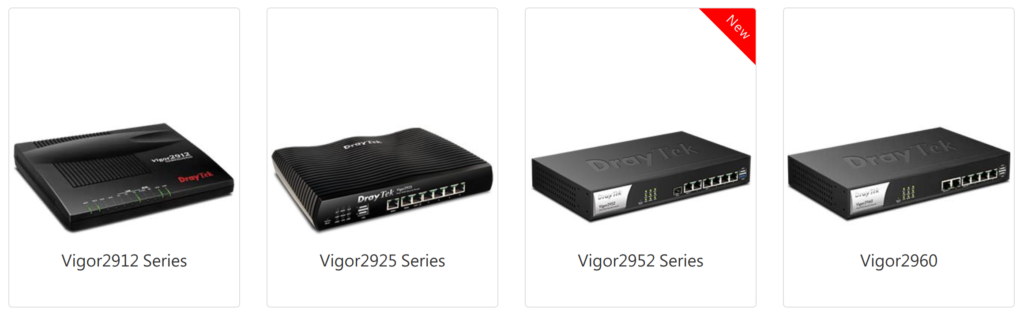
Vigor2925 SeriesDual WAN
Security firewall router
- Dual Gigabit Ethernet WAN port for failover and load-balancing
- 5 x Gigabit LAN ports with multiple subnets
- Support IPv6 & IPv4 network
- Support central AP / VPN / Switch Management
- 50 VPN tunnels with comprehensive secure protocols
- VPN load-balancing and backup for site-to-site applications
Definitions
Client router: we call it router S here. This is the router which makes a dial-out VPN connection to the server router, which we assume it’s located in Japan.
Server router: we call it router D here, This is the router which accepts a dial-in VPN connection from the client router, which we assume it’s located in the United States.
Configuring the router S:
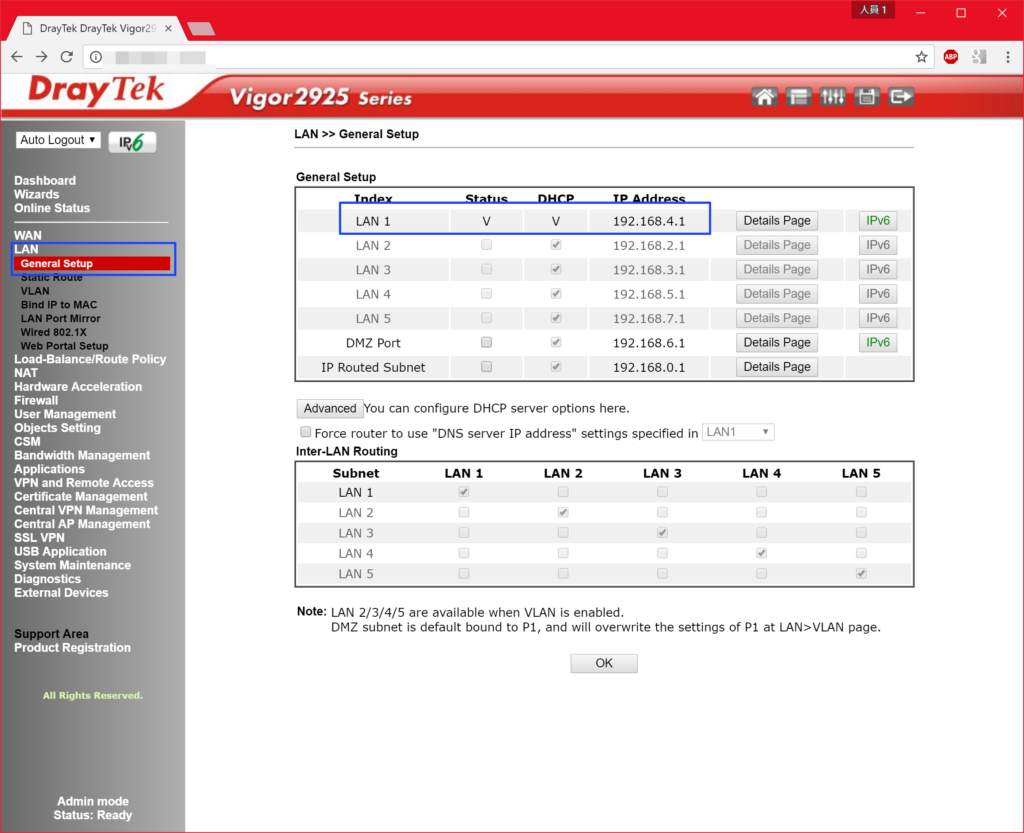
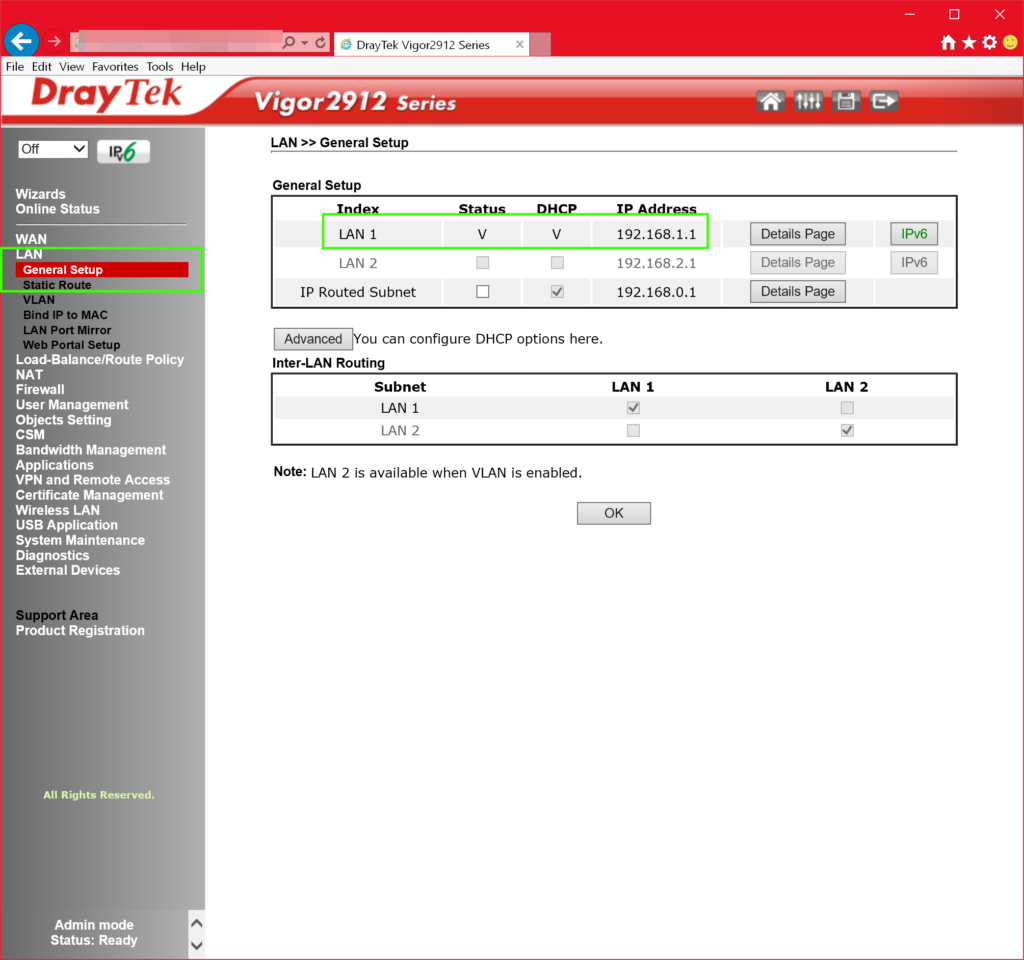
Step 1. Login the DrayTek router’s admin web page and click on LAN-General Setup. Right here, we especially change the LAN 1‘s subnet range to 192.168.4.1 (it might be 192.168.0.1 or 192.168.1.1 by default)
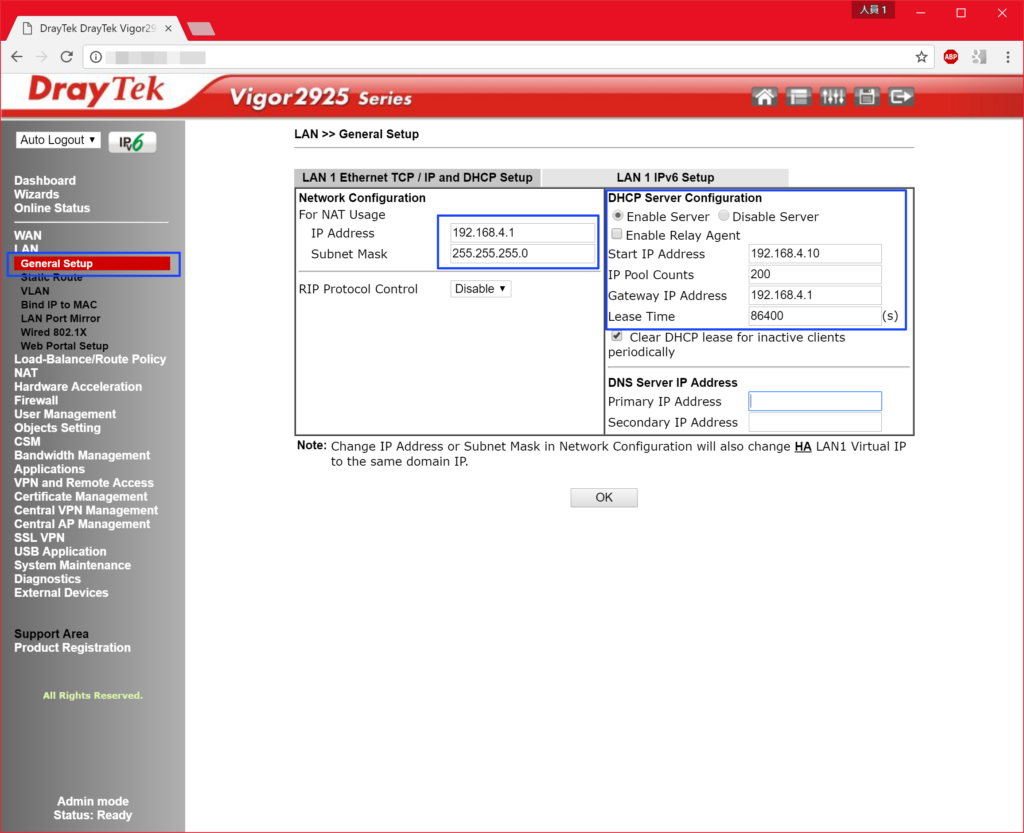
Step 2. Click on the details page of LAN/General Setup and make changes like the following image.
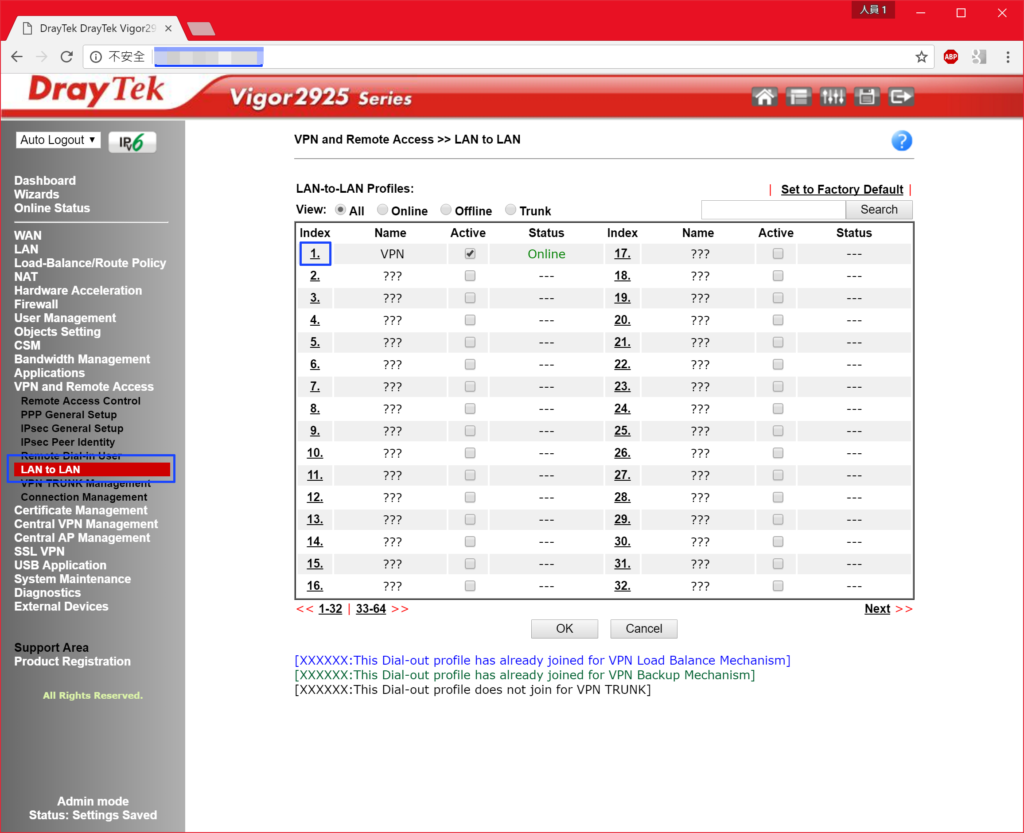
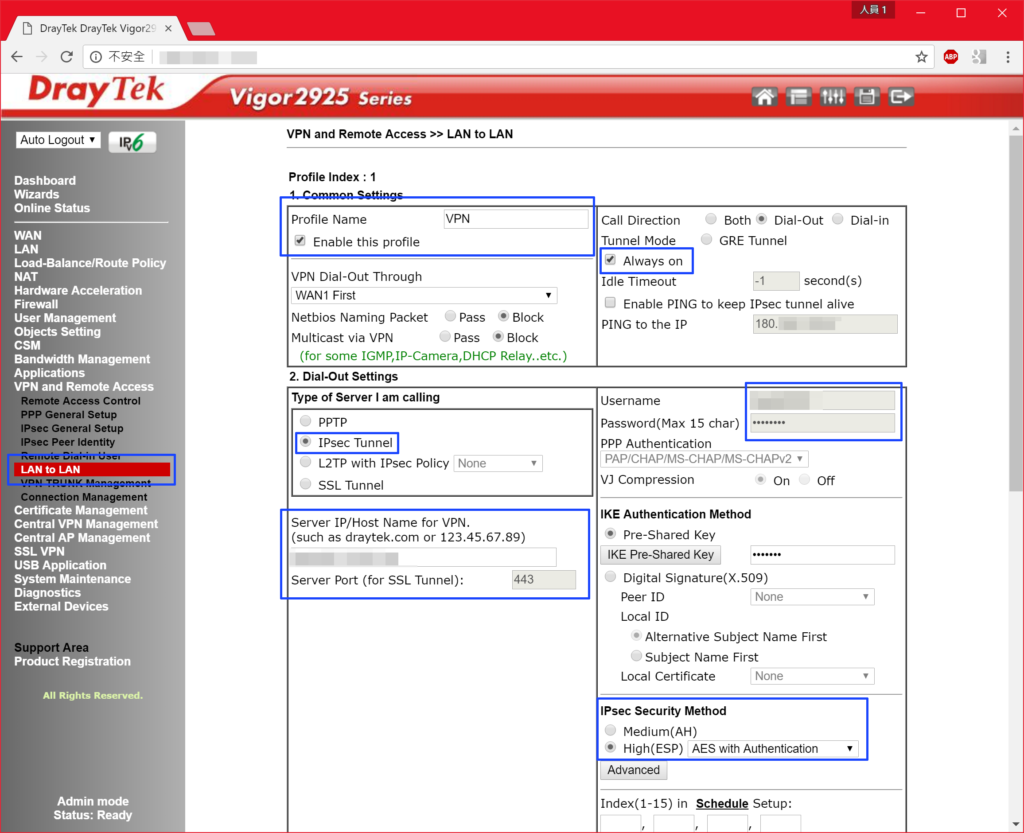
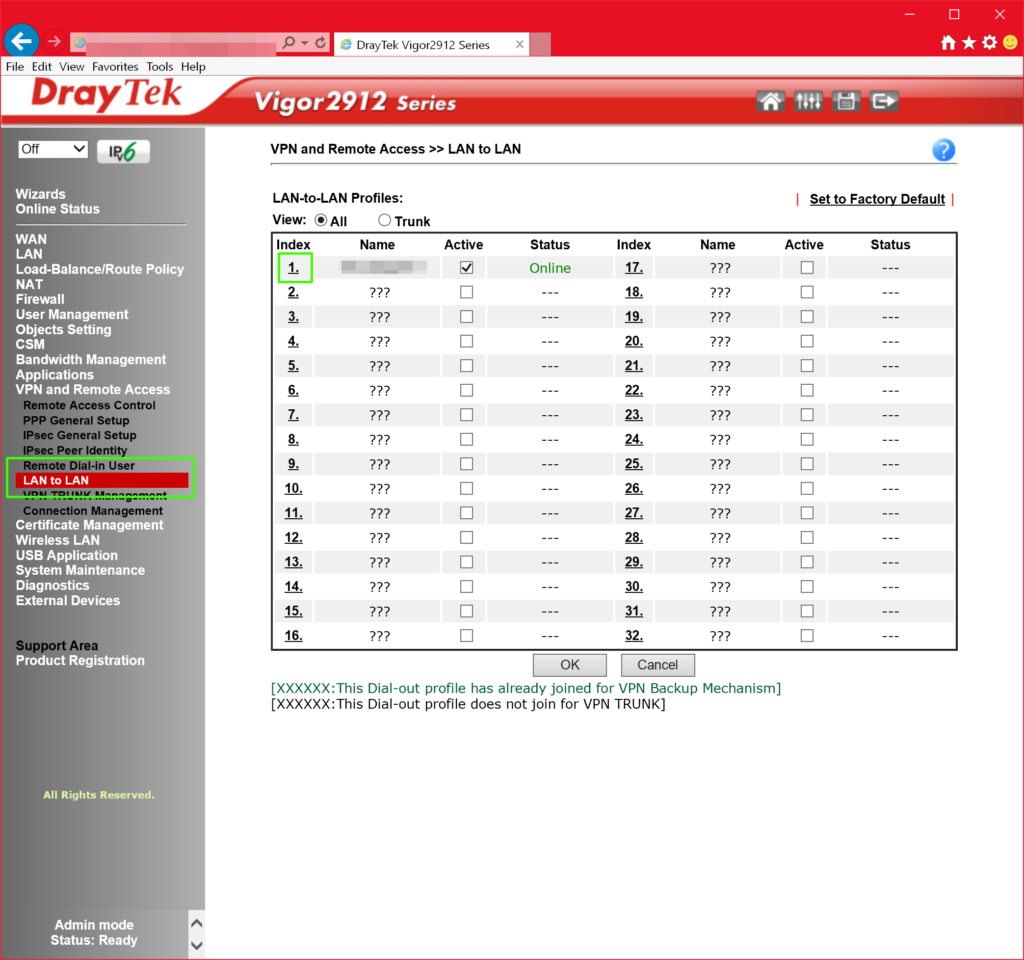
Step 3. Click on VPN and Remote Access-LAN to LAN. Right here, we are going to setup a new VPN profile. Click on the 1. link here
Step 4. Make sure you correctly enter everything marked by blue square. The Server IP or Host Name would be your router D’s address. The Username and Password should be anything you want to use, but make sure you jot them down. Also, make sure it’s strong enough for security reasons.
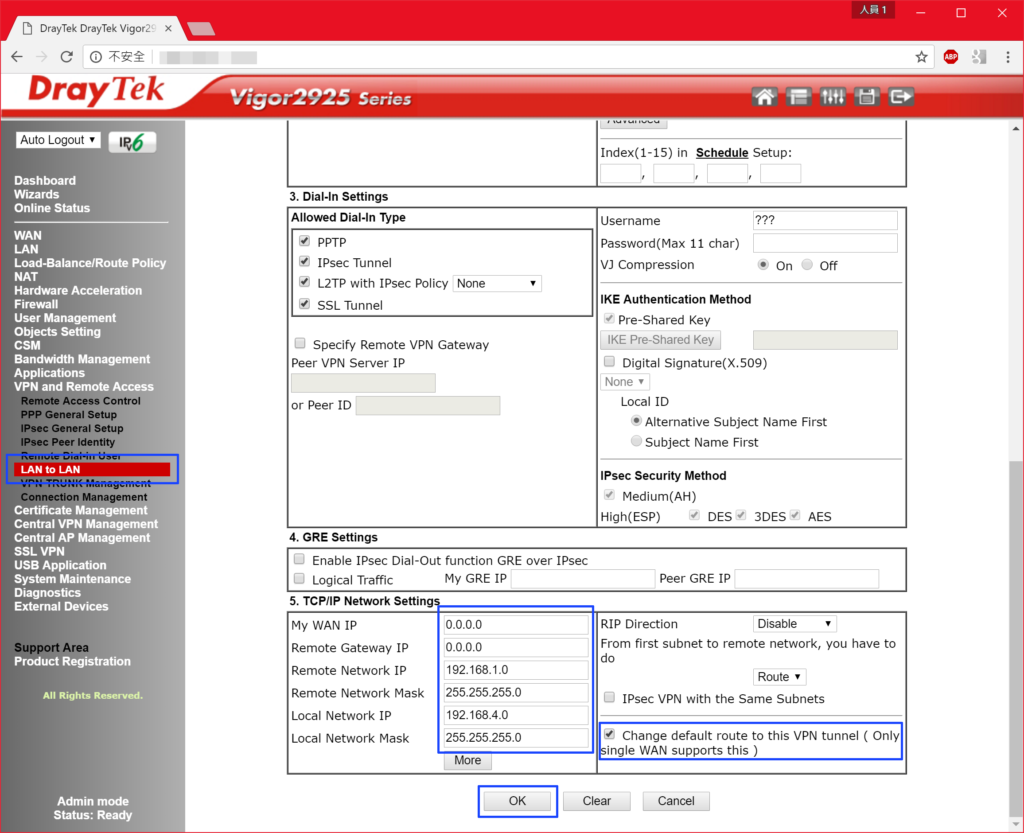
Step 5. In the TCP/IP Network settings section of LAN to LAN, use exactly the same settings suggested here. Note that we make the router S to use 192.168.4.x as the LAN subnet range, and 192.168.1.x as the router D’s LAN subnet range.
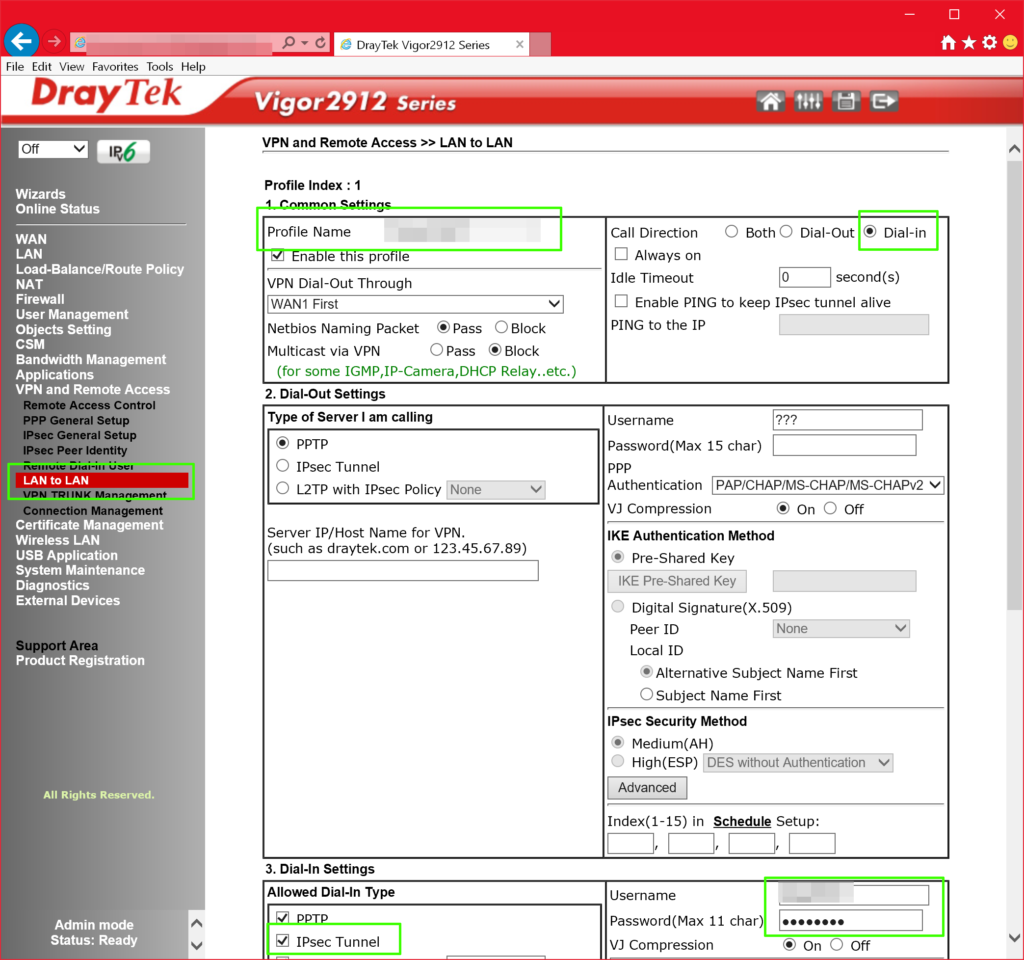
Configuring the router D:
Step 1. Login the DrayTek router’s admin web page. Click on LAN-General Setup. at here we especially change the LAN 1’s subnet range to 192.168.1.1
Step 2. Click on LAN to LAN section of VPN and Remote Access. Right here, we are going to setup a new VPN profile, click the 1. link here
Step 3. Make sure that you correctly enter everything marked by blue square. The Username and Password should be exactly the pair you entered in router S.
Step 4. in the TCP/IP Network settings section of LAN to LAN, use the exactly the same settings suggest here. Note that the settings here will look like the reverse settings of router S.

Step 5. After everything is configured, wait for 1 or 2 minutes or reboot both routers. Click Connection Management, and see if the dial-in connection is built.
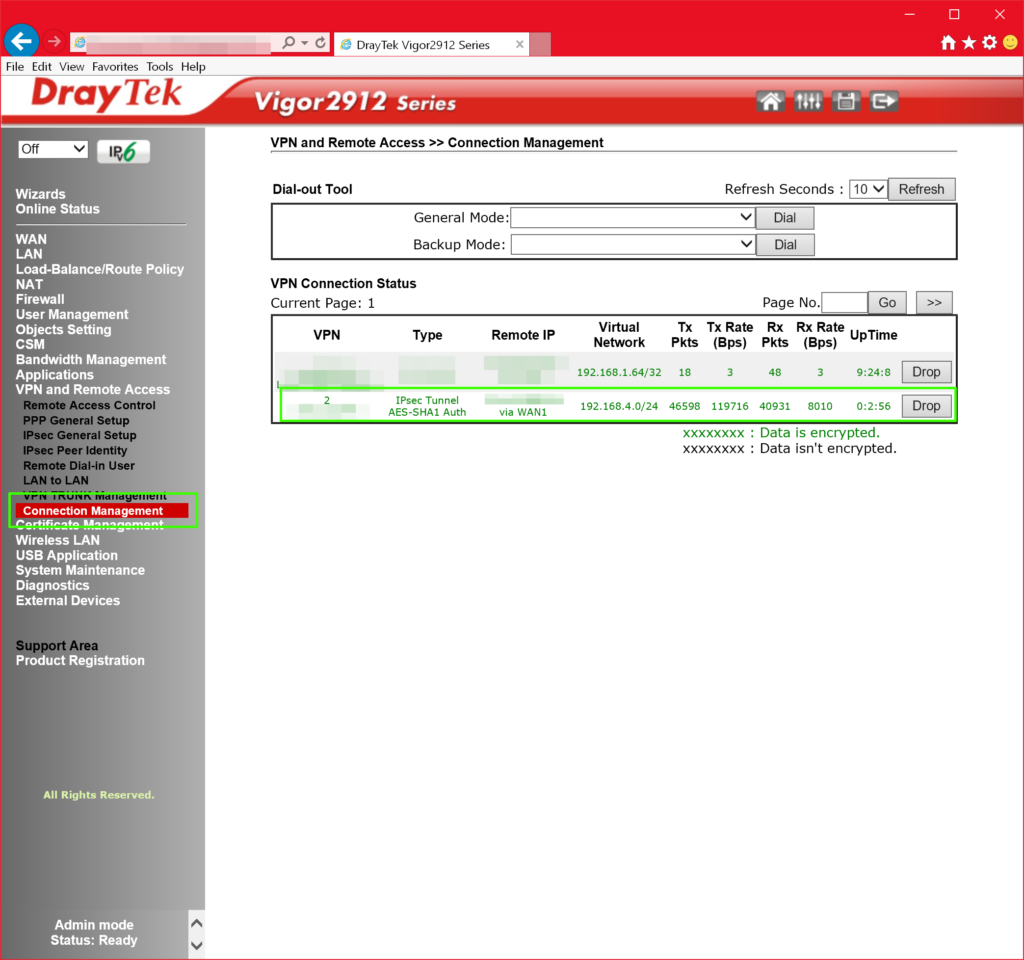
Confirming if the VPN connection works
Now, if you connect your cell phone to router S (in Japan) and browse to a web site that restrict accesses from outside of United States, for example, Netflix, the web site should treat you as if you are a user from router D’s IP address which is located in United States.
If you are looking for a reliable VPN service provider, we recommend you this VyprVPN, because it works on almost all devices.