

For any Windows person like me, it is easy to create a non-SSL website that starts with “http://“. But, it is not an easy job to add a SSL certificate to the website that starts with “https://“. Why so? We usually panic when it comes to CSR creation, purchasing SSL certificate from CA (certificate authority), editing httpd.conf and httpd-ssl.conf files as well as testing if SSL is running. In this article, we will show you how in an example that deploys Wamp server 3.0.6 x64 with component version of:
- Apache 2.4.23
- MySQL 5.7.14
- PHP 5.6.25-7.0.10
Also, the demo environment has non-SSL website opearting on port 80. Now, we will use the least and simliest steps to get it done:
Create CSR
- I use a CSR generating tool within a mail server software. You create self-signed certificate, private key and CSR files during its 7-days trial period.
- Download EVO Mail Server software and install it.
- Start EVO Mail Server GUI.
- Click on Setting tab.

- Scroll down to 6.SSL (TLS) Certificate and Private Key Setting.
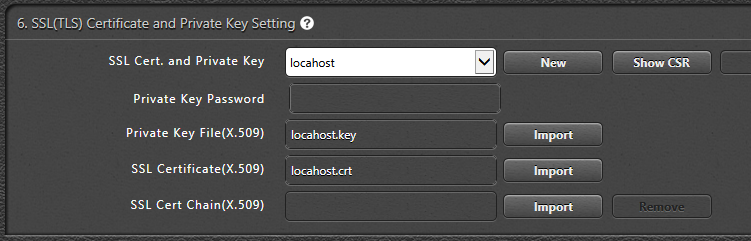
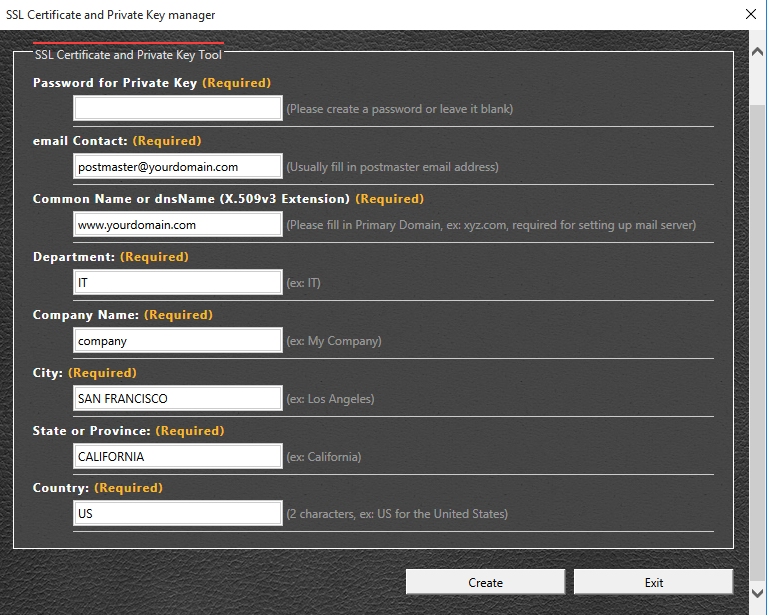
- Click on New.
- Enter your certificate information accordingly and click on Create.
- Certificate and private key files will be saved in C:\PrograData\EvoMailServer\CONFIGS\CERSTORE\.
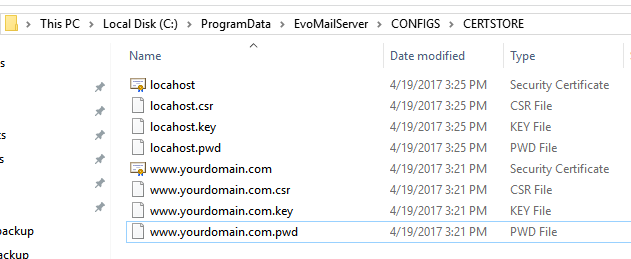
- Browse to the folder above and copy & paste to some place for future reference.
- There is another website that I googled and it does the same thing. https://csrgenerator.com/. Use this generating tool with caution if you are afraid your domain certificate information will leak.
- Once all information is entered, click on Generate CSR button.

- You will see both CSR code and private key code.
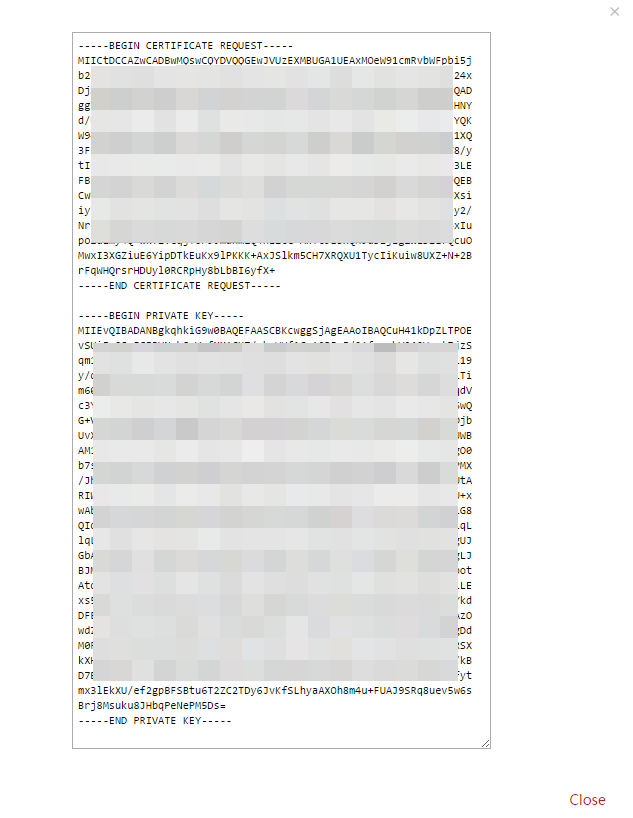
- Copy and paste them to notepad.
- Save both clipboards into yourdomain.CSR and yourdomain.KEY respectively for later use.
- Once all information is entered, click on Generate CSR button.
Purchase certificate
- Every CA website shares similiar purchase routine:
- Open yourdomain.CSR file that you created from Create CSR step and copy & paste the content to CA website.
- Define certificate properties, such as subscription period,
- Enter domain validator’s e-mail address.
- Fill in remaining company and contact information before submitting a purchase.
- Make payment to purchase certificate by filling credit card information, Paypal or etc.
- Complete domain validation as instructed in validating e-mail.
- Receive CA-signed certificate and CA-bundled certificate in e-mail box that you used to fill in contact information.
Implement SSL certificate
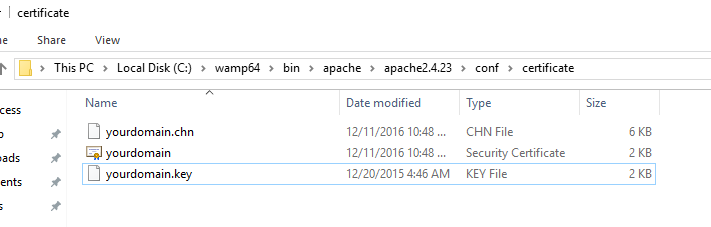
- Create a folder called CERTIFICATE under c:\wamp64\bin\apache\apache2.4.23\conf\.
- Collect youdomain.KEY (created when you create CSR file), yourdomain.CRT (received from CA) and yourdomain.CA-BUNDLE (received from CA) altogether. Copy all 3 files and paste them to CERTIFICATE folder that created in step 1.
Configure httpd.conf
- Open C:\PrograData\EvoMailServer\CONFIGS\httpd.conf.
- Find #LoadModule ssl_module modules/mod_ssl.so and remove # sign in the front.
- Find #Include conf/extra/httpd-ssl.conf and remove # sign in the front.
- Find #LoadModule socache_shmcb_module modules/mod_socache_shmcb.so and remove # sign in the front.
Configure httpd-ssl.conf
- Open C:\PrograData\EvoMailServer\CONFIGS\extra\httpd-ssl.conf.
- Find <VirtualHost _default_:443> and edit a few lines below it.
- Find DocumentRoot “c:/Apache24/htdocs” and modify the folder location to where you place your website files. In our example, it is: DocumentRoot “c:/wamp64/www”
- Find ServerName www.example.com:443 and modify it to your web site. In our example, it is: ServerName www.yourdomain.com:443.
- Find ServerAdmin [email protected] and modif it to your admin e-mail address. In our example, it is: ServerAdmin [email protected].
- Find ErrorLog “c:/Apache24/logs/error.log” and modify it to the log folder. In our example, it is: ErrorLog “c:/wamp64/logs/error.log”.
- Find TransferLog “c:/Apache24/logs/access.log” and modify it to the log folder. In our example, it is: TransferLog “c:/wamp64/logs/access.log”.
- Find SSLCertificateFile “c:/Apache24/conf/server.crt” and modify it to proper file location and file name. In our case, it is: SSLCertificateFile “c:/wamp64/bin/apache/apache2.4.23/conf/CERTIFICATE/youdomain.CRT”.
- Find SSLCertificateKeyFile “c:/Apache24/conf/server.key” and modify it to proper file location and file name. In our case, it is: SSLCertificateKeyFile “c:/wamp64/bin/apache/apache2.4.23/conf/CERTIFICATE/yourdomain.KEY”.
- Find #SSLCertificateChainFile “c:/Apache24/conf/server-ca.crt” and remove # sign in the front. Then, modify it to proper file location and file name. In our case, it is: SSLCertificateChainFile “c:/wamp64/bin/apache/apache2.4.23/conf/CERTIFICATE/yourdomain.CA-BUNDLE”.
Testing SSL certificate
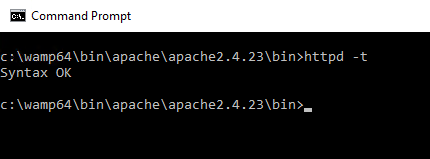
- To test if syntax works, we run Command Prompt and run “cd c:\wamp64\bin\apache\apache2.4.23\bin\” command.
- Then, type “httpd -t” command to check if syntax is ok?
- Before checking if “https://” webpage is working, we need to restart Apache service. To do so:
- Open Windows’s Task Manager.
- Click on Services tab at the top.
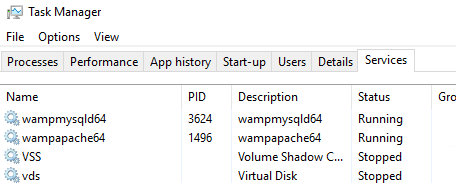
- Under Name, find wampapache64.
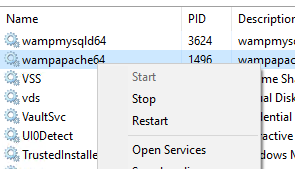
- Right-click on the entry and select Restart.
- Open web browser, type in “https://www.yourdomain.com/” and see if web content is displayed?