
When you open your e-mail software on computer or your mail app on your mobile device, you probably would pay attention if there is a small number in paranthesis next to inbox folder notifying you if you have any incoming or unread mails. Likewise, there is also a small number in paranthesis next to spam folder. Normally, this spam number is growing slowly and increasing maybe a few dozens the most for an entire day.
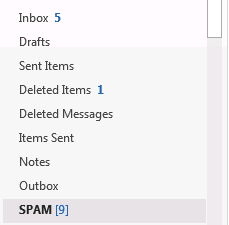
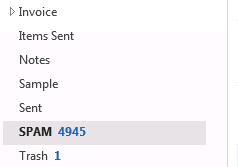
For the past few months, things are getting different that this spam number grows rapidly and I am getting a few hundreds or even up to 1000. The following screenshot demonstrates that I am getting close to 5000 within just 5 days.
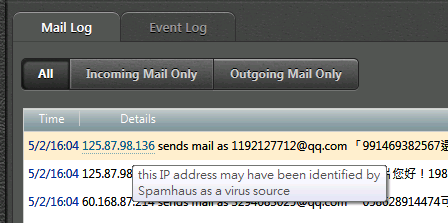
When you open the SPAM folder, mails appear to be sent every few minutes and almost 99 out of 100 mails come rom QQ.COM. I had encountered this junk mail outbreak years ago. All I did was deleting them all from my spam folder on a daily basis until the spam source ceased one day.
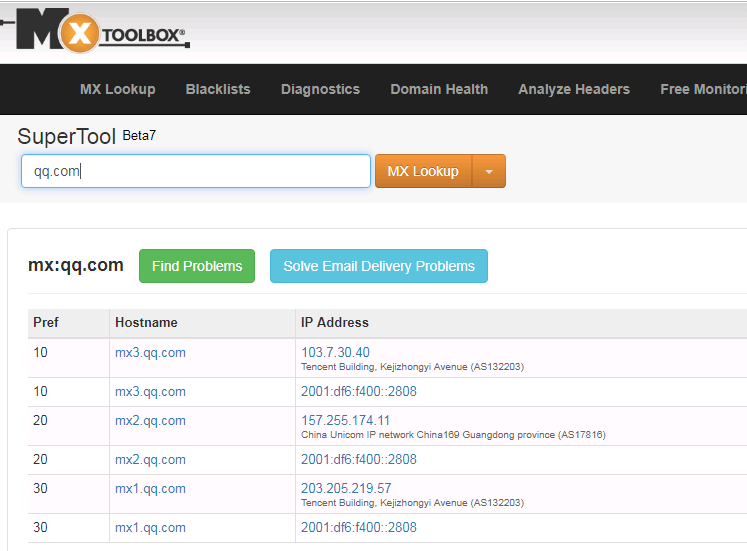
For mail administrators, perhaps there is a better solution to stop such outbreak from hitting spam folders in users’ mailboxes. Here, I use EVO Mail Server and tools on MXToolBox website to demonstrate the logic behind the solution.
Typically, such spam mails were sent from hosts with spam IPs. I have checked QQ.COM’s authorized hosts in their MX records and all of them are healthy against blacklist check.
On EVO Mail Server’s mail log, if you move mouse pointer on sender’s IP of a spam mail, you can see the IP with description stating it is a spam or virus source.
EVO Mail Server provides a spam flag attached to each incoming mail. As soon as an e-mail comes in, the spam flag will be defined based on IP comparison result against IP black list on Internet community, such as dnsbl.info or spamhaus.org. Then, we can use EVO Mail Server’s spam filter to locate mails with defined spam flag and delete them at the gate.
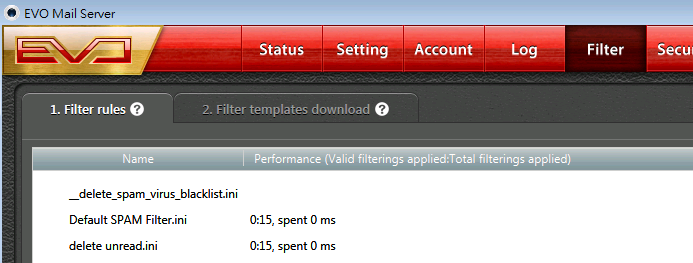
Here is how to define the filter:
#1. Download and install EVO Mail Server from EVO’s official website.
#2. Configure EVO Mail Server according to a tutorial video on this blog.
#3. Once EVO Mail Server is properly configured, click on Filter tab and click on New button at lower right.
#4. Create a filter according to screenshot below:
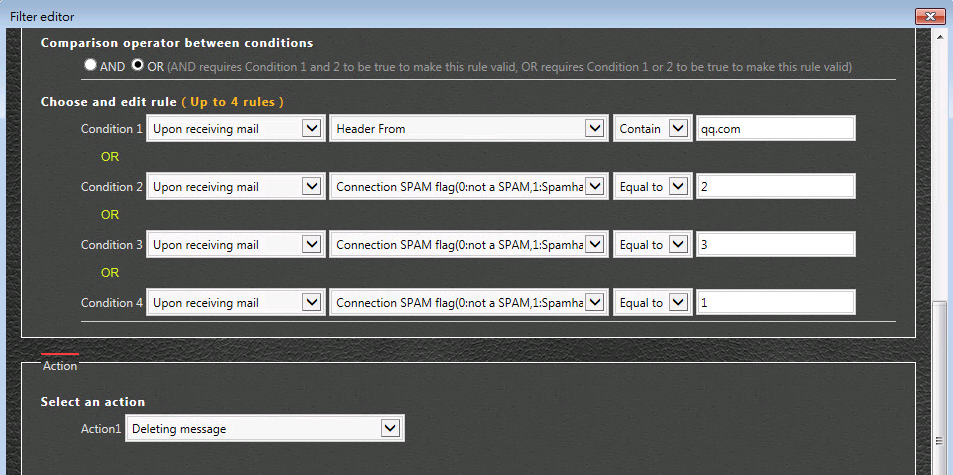
The advantage of defining a filter rule on mail server is that the deletion can be centralized rather than having users to manually delete spam flood sent from QQ.COM. Also, if users are using POP3, then it is difficult for them to select spam mails and delete.