Mail Server Antispam
In server security, IT staff managing mail or SMTP servers are well aware that spam mails pose a significant threat alongside other types of hacks. Various methods exist to combat both incoming and outgoing spam mails.
For incoming mails, keyword filtering, graylisting, IP & domain blacklisting are the basic strategies. For outgoing mails, tightening up password complexity on individual client PCs and blacklisting intruding brute force password wild-guessing are must.
Recipient Mail Server Returns Mail or Treat as Spam Mail
Today, our focus is on preventing mail returns or being marked as spam in destination servers. A fundamental lesson in Mail Server Management is to ensure that your IP and domain are not listed on Internet community blocklists like Spamhaus, DNSBL, and others. If listed, visit these blocklist websites to learn how to get delisted.
Gmail and Outlook.com/Office 365 Antispam Scheme
For the past few years, Gmail and Outlook.com/Office365 started to evaluate whether an incoming mail is spam or not by checking its SPF and DKIM value. Yet, DMARC record will also be verified. Not only this, major mail service providers also explicitly urge senders to deploy all three records or mails will be rejected.
What are SPF, Dkim and DMARC?
Implementing SPF, DKIM, and DMARC is an effective approach to combat spam. If you’re unfamiliar with these techniques, you can find more information about them on Wikipedia or other reliable sources. Once properly configured, there’s no need for further action. When emails from your mail server reach the destination, the receiving server will check for these three records in your DNS hosting service. If everything is in order, the emails will be delivered to the recipient’s inbox. However, if any issues are detected, the emails may either be returned or marked as spam.
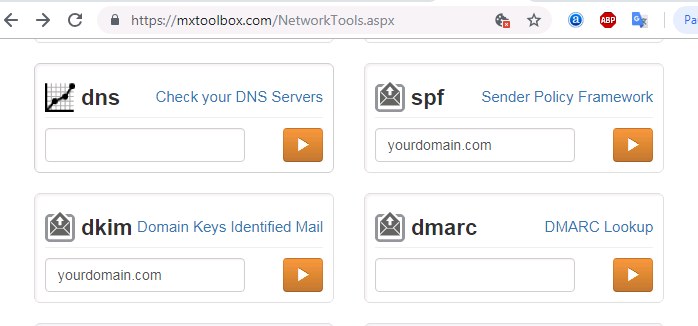
If you cannot be sure what your mail server has been configured, then you can use MXToolBox website to check:
- SPF: https://mxtoolbox.com/spf.aspx
- DKIM: https://mxtoolbox.com/dkim.aspx
- DMARC: https://mxtoolbox.com/dmarc.aspx
In case you forgot MXToolBox, you can still google keywords such as dkim checker, dkim record, dkim validator, dkim test and so on. For SPF and DMARC, you can simply swap dkim with spf and dmarc.
The reason behind grouping these three records is that both SPF and DKIM must be configured prior to implentation of DMARC. Let us first start the how-to on SPF, DKIM and then DMARC. For the following example, we will use Zoneedit DNS service provider:
SPF:
When you open DNS record list and add a SPF record, look for SPF record type. If SPF is not available in the record list, selecting TXT record would work too. For HOST, keep default value of @. In TEXT part, enter generic setting shown as below:

“v=spf1 a mx ip4:123.123.123.123 ptr ~all”
Note: The quotation mark may or may not be needed. Check with syntax usage on your DNS service. The IP address following “ip4:” is your mail server’s IP address. Syntax usage is available in SPF wiki since OpenSPF official website is not available at the moment of writing.
DKIM:
There are two ways of producing DKIM key pair. One is simply getting private key and public key from DKIM Generator on Internet. The downside of it is that the private key will not be consistent with the private key you use for your mail server’s SSL certificate.
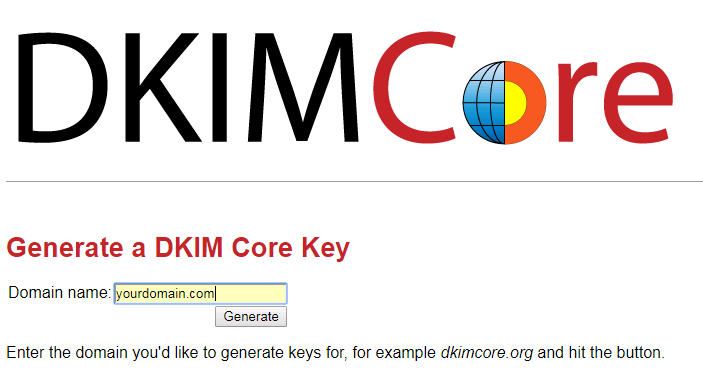
Another one is using mail server to natively generate both private key and public key. We will benefit from using the same private key for both DKIM and SSL certificate. It will save us time in the long run.
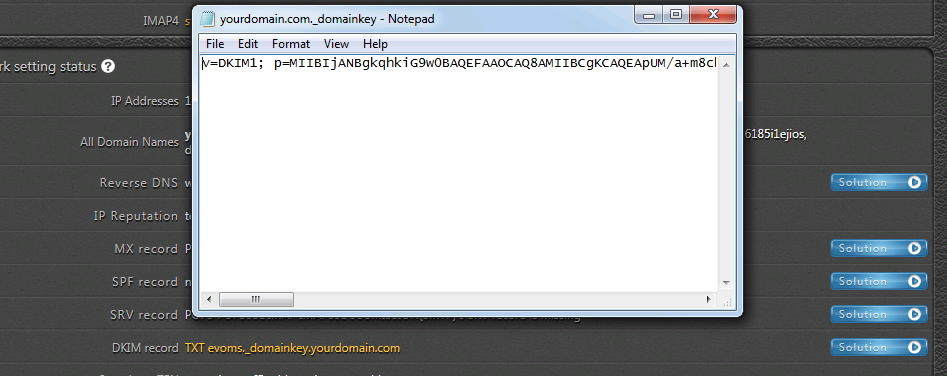
Let’s cut to the point. Here are the steps:

- Once private key and public key are ready, log in DNS service and add a DKIM record using TXT record type.
- For HOST value, enter selector given by your mail server’s DKIM feature. In case you do not know the DKIM selector value, consult your mail server vendor. For EVO Mail Server, the value is simply evoms_domainkey.
- In TEXT part, put down DKIM public key that we previously created. The syntax should look like below:
v=DKIM1; p=public key value
public key value is the public key you get from DKIM Generator. If with EVO Mail Server, simply click on blue solution button to the right of DKIM check in Network section of Status page. There will pop up a notepad page, simpl select all and copy & paste them.
Note: With DKIM Generator method, be sure to save the private key as yourdomain.crt file and store it in mail server’s certificate folder. If you did not save it and lose the private key, then everything will start all over again. On the other hand, if your mail server natively support generating DKIM, then private key file should have already been saved somewhere inside mail server.
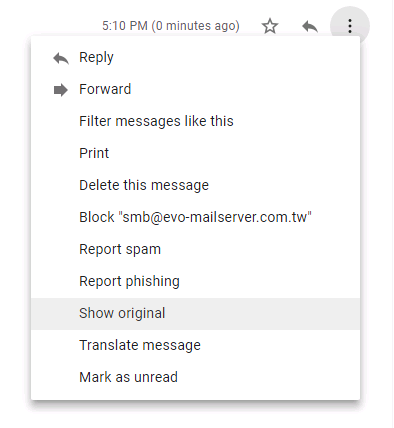
Practically, we can check both SPF and DKIM in Gmail’s INBOX. Open a testing e-mail sent from your mail server. Click on “3-dots” at top-right and click on Show original:
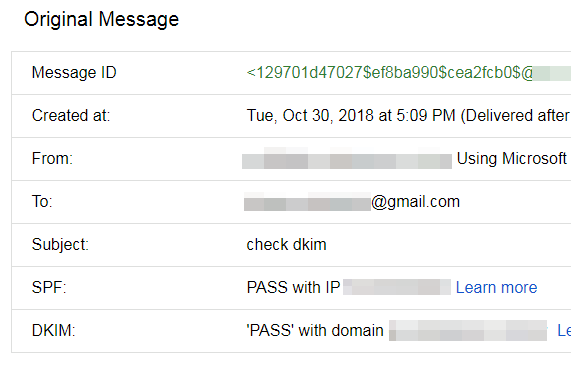
Then, in the popup window, we will see that both SPF and DKIM have a pass status:
DMARC
After we confirm both SPF and DKIM records are set and valid from the Gmail verification as well as MXToolBox checking below:
we can continue with DMARC:

- Log in DNS service and add a DMARC record, using TXT record type.
- For HOST value, simply enter _dmarc.
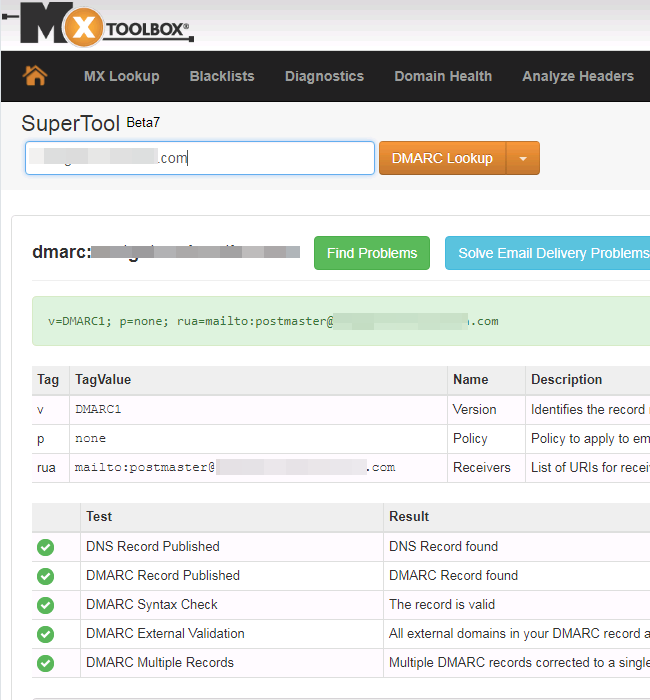
- For TEXT part, refer to DMARC’s official website. An example would look like this below:
v= DMARC1; p=none; rua=mailto:[email protected] - Once the record is saved, wait for a few hours for DNS settings to kick in. Then, use MXToolBox website to check if DMARC record is looking good?
- In the future, receiver mail server will send a forensic or aggregate report to the e-mail address specified in the syntax string for further analysis.
In conclusion, to prevent your mail server from being flagged as a spam source, it’s crucial to ensure the presence of SPF, DKIM, and DMARC records when emails reach the receiving server. This implementation applies not only to standard mail servers that support SPF, DKIM, and DMARC, but also to certain appliance mail servers like Synology MailPlus Server. (Refer to the admin guide).
